Post by jlafrenz on Jan 25, 2014 20:27:19 GMT -5
Here is my latest acoustic panel build. As always, they have a simple design and can be built with tools found in most garages. They are very similar to the panels I used in my first tutorial, Acoustic Panels/Bass Traps, but came out much better looking. They are designed for 2" panels with a 1.5" gap for air space behind them. You can use this same design for thicker panels using 1x6's or 1x8's and doubling or tripling up your acoustic material.
Tools:
Tape Measure
Saw (chop/miter works best)
Staple Gun
Cordless screwdriver/drill
Countersink bits
Hammer
Pen/pencil
Square
Corner Clamps
Quick Clamp
Hammer
Materials:
1x4 (8ft in length typically) boards
Wood Glue
Screws (I used drywall screws)
Staples
Brad or finish nails
Picture mounting hardware (if hanging, pics below)
Fabric of your choice - I would recommend at least 60" x 36"
Acoustic material - Roxul 60, Owens Corning 703/705, rigid fiber board
You can find acoustic material at local HVAC dealers or on the web at www.atsacoustics.com/cat--Fiberglass-and-Mineral-Wool-Batts-and-Boards--106.html or from GIK Acoustics at www.gikacoustics.com/product-category/building-supplies-diy/
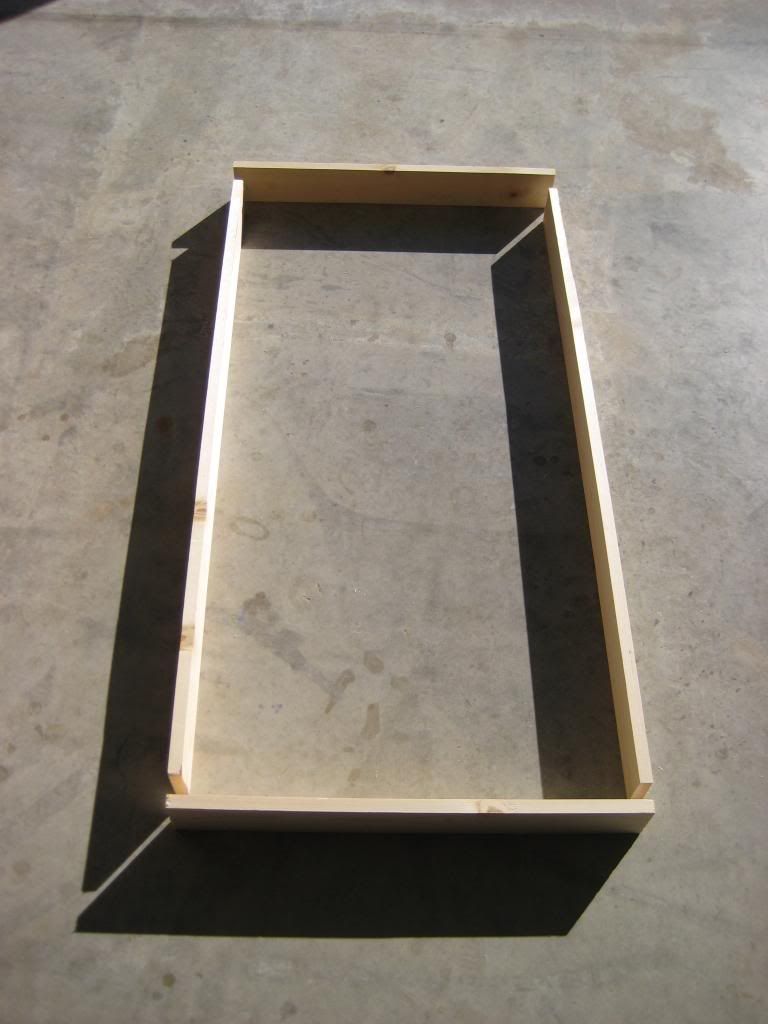
To get started, you will need to cut all your boards to length. Here are your measurements:
48" x 2 boards
25.5" x 2 boards (they are longer for overlap with the 48" boards)
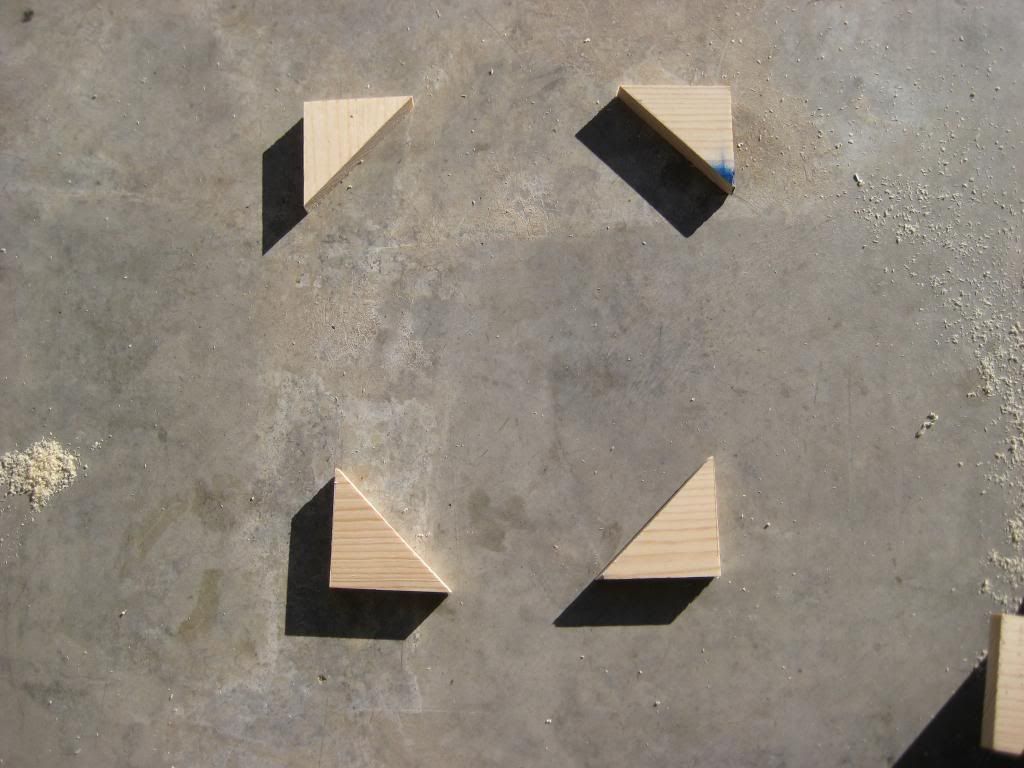
4 Corner pieces (see below)
This is the layout of the boards. The shorter pieces go on the top and bottom of the longer ones.
Corner braces. I just used the saw and made 45 degree angle cuts from the left over section of board. One will go in each corner of the frame. More on this shortly.
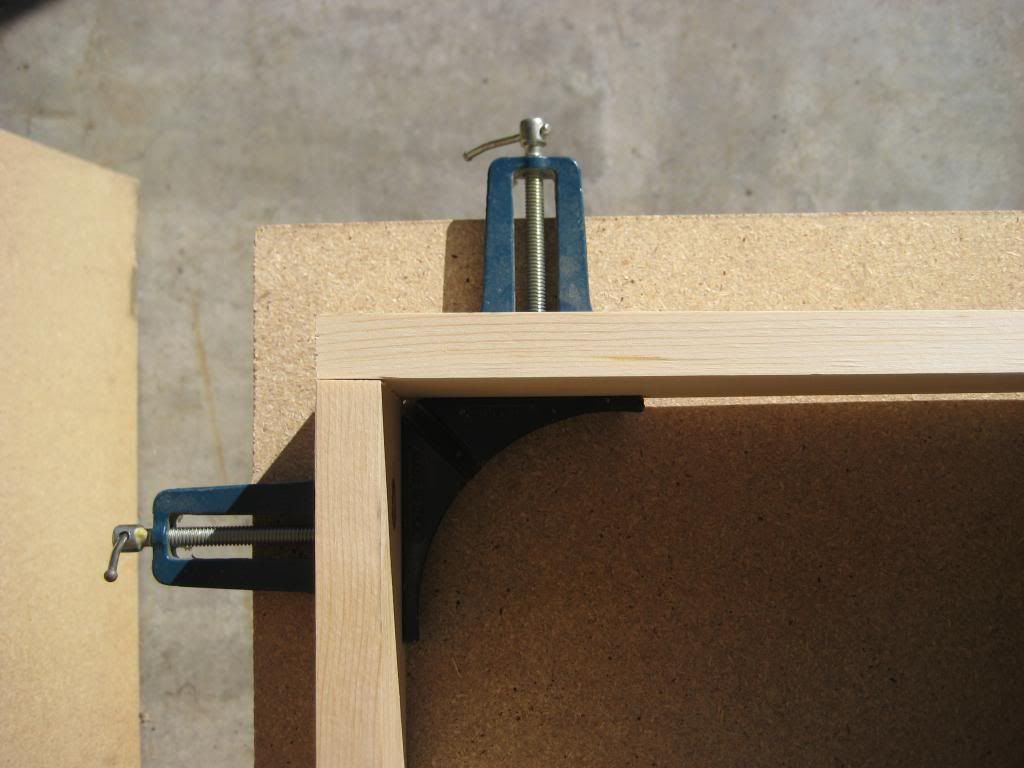
After you have all your boards cut, you will want to join the corner together. This is were you will use your corner clamps. They are not required, but help out a lot. Your corner should look like the picture below with the shorter piece on top.
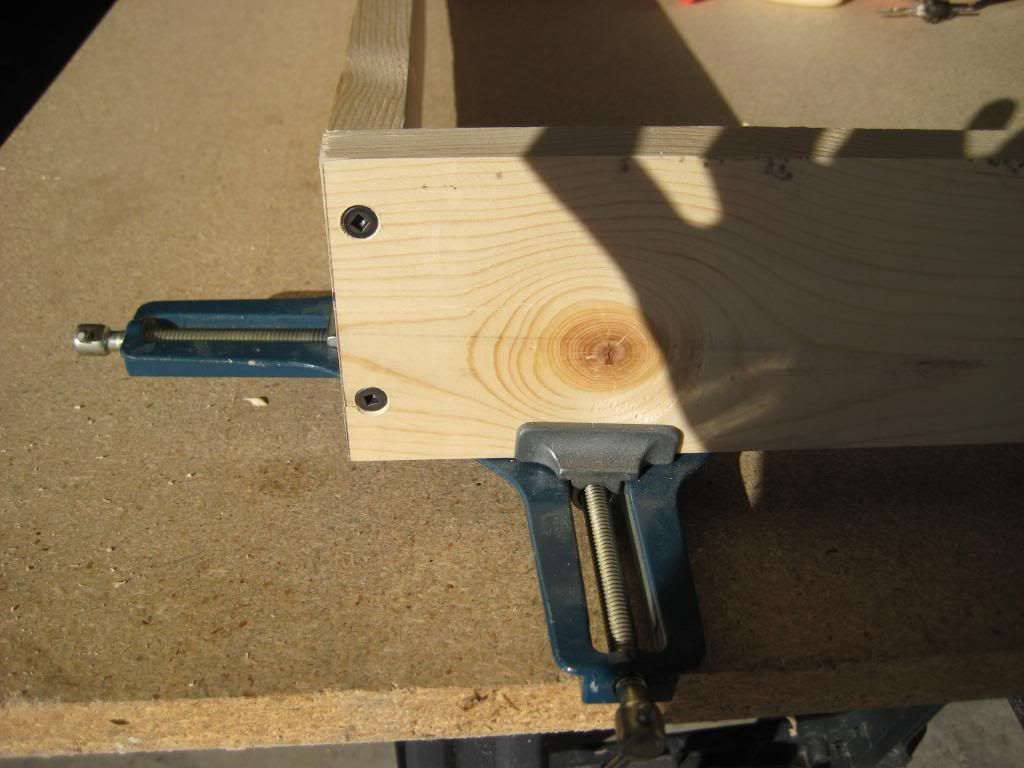
At this point, you are ready to drill your holes. Some of you out there will think about skipping this step. I highly recommend that you don't. Pre-drilling will keep from splitting the wood and you losing your temper. It is best to use a countersink bit so that the screws sit flush or even slightly recessed into the board. If you don't have countersink bits, not big deal. You can drill a pilot hole the correct size for your screw first and then use a larger bit in the same spot barely drilling into the wood to accomplish the same thing.
Once you have your holes drilled, undo only one side of the corner clap. Use wood glue one both pieces of the wood at the corner. Then you will line up your corner again and tighten the clamp. Now you can proceed with screwing the corner together. The screws will hold the corner together so you can take off the corner clamp. If you have more than one, I keep it on until I have screws in both sides.
Now that you have all 4 corners glued and screwed, you are ready to move on to installing the corner braces. These corner braces have 2 important jobs. The first is obviously to brace the corner. The second is to keep the acoustic material at the front of the frame and provide the proper air space behind the panel. To place these properly, simply use a scrap piece of your 1x4 and place the corner and then place a corner brace on top of it. Since a 1x4 actually only measures .75", doubling them up will give you 1.5" of air space and leave 2" for the material. You will only attach the corner brace, not the board underneath you are using as a spacer. It should look like this.
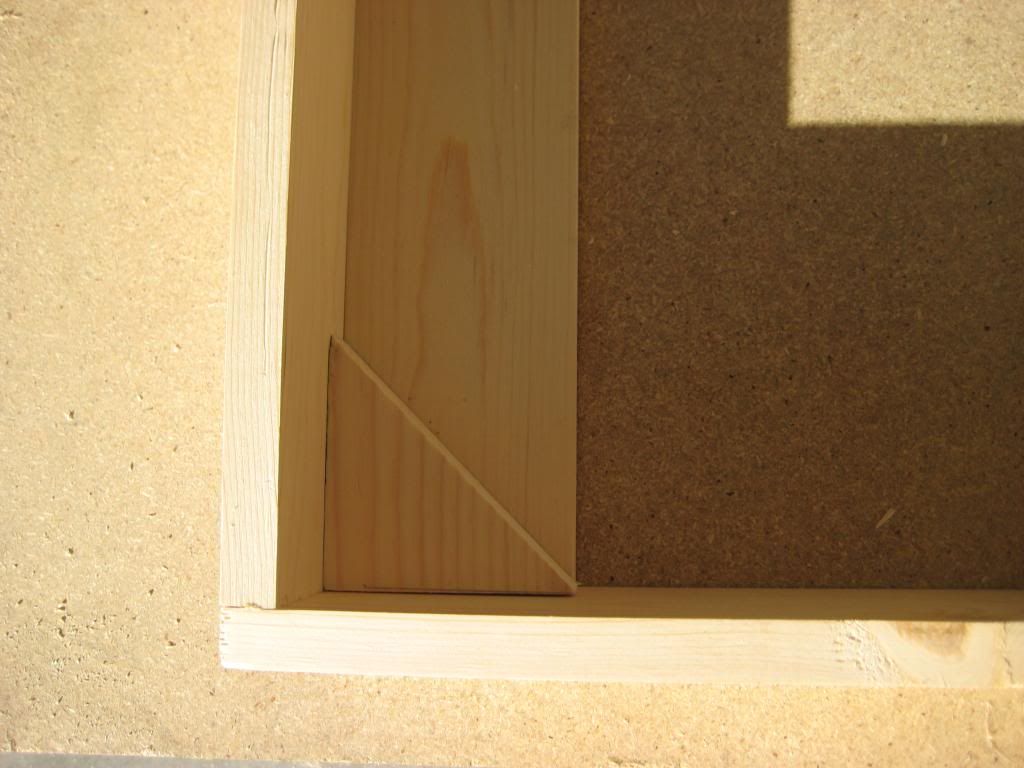
Now you will apply glue to each side of the corner brace and frame. At this step I opted to use a clam to secure the corner while I put a finish nail in from the outside. I did this because the screw is a bit too larger for the amount of material in the corner. Moving it in where there is more wood runs the risk of the screws hitting each other. In the picture below you can see how I clamped the corner and the nail in the outside. Do this on both sides. The trick is measuring up .75" to 1.5" so you have a guide as to where your corner brace is actually sitting in the frame.
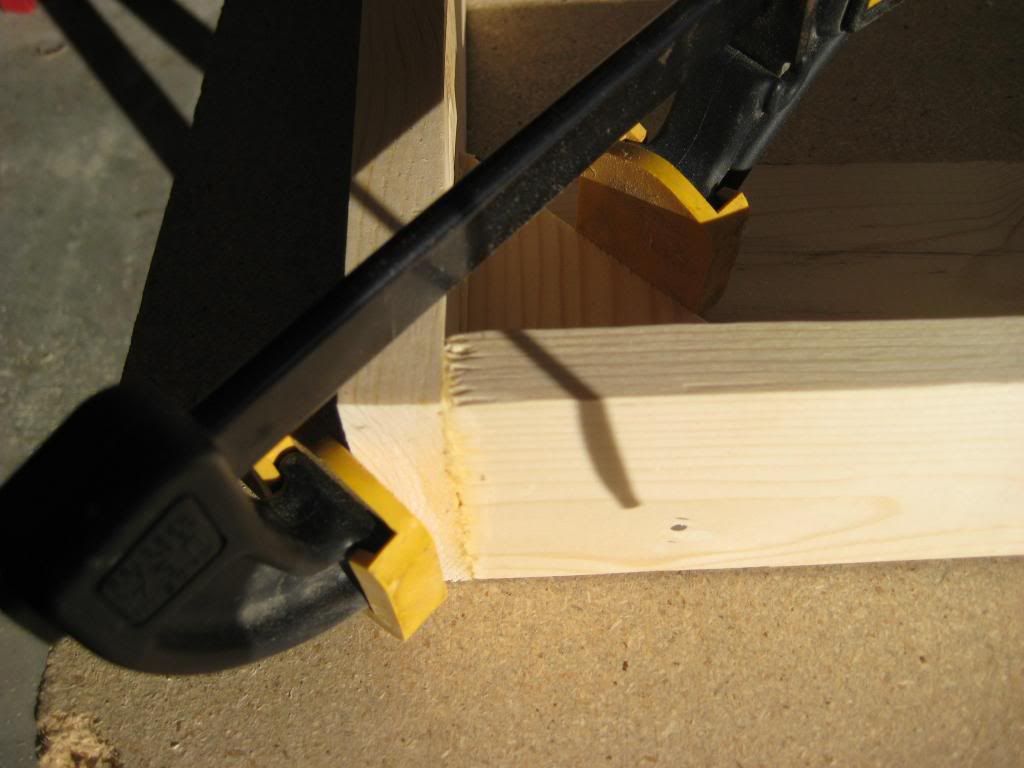
Repeat this process for the remaining 3 corners. Here are a couple pic of the corner braces in place.
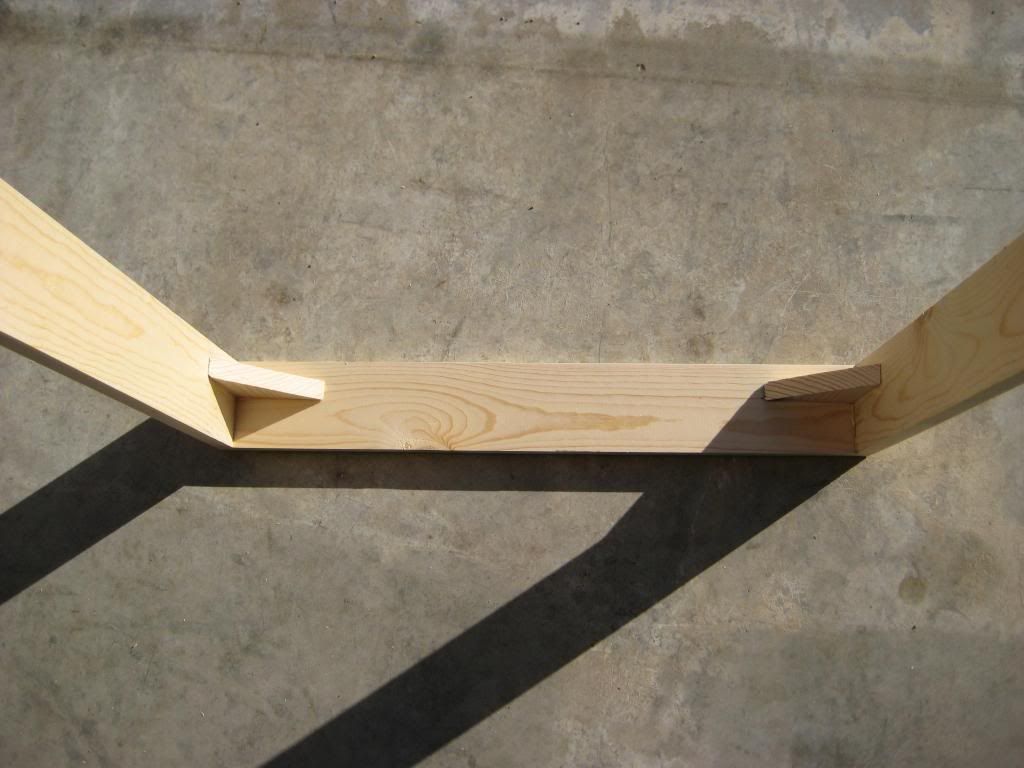
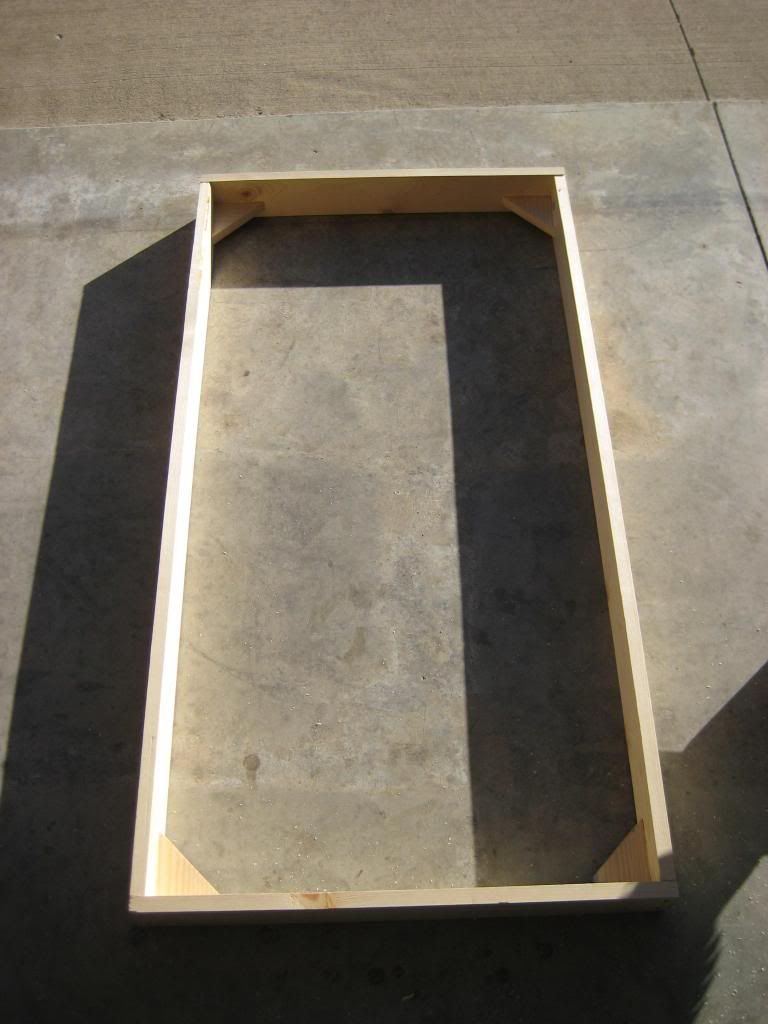
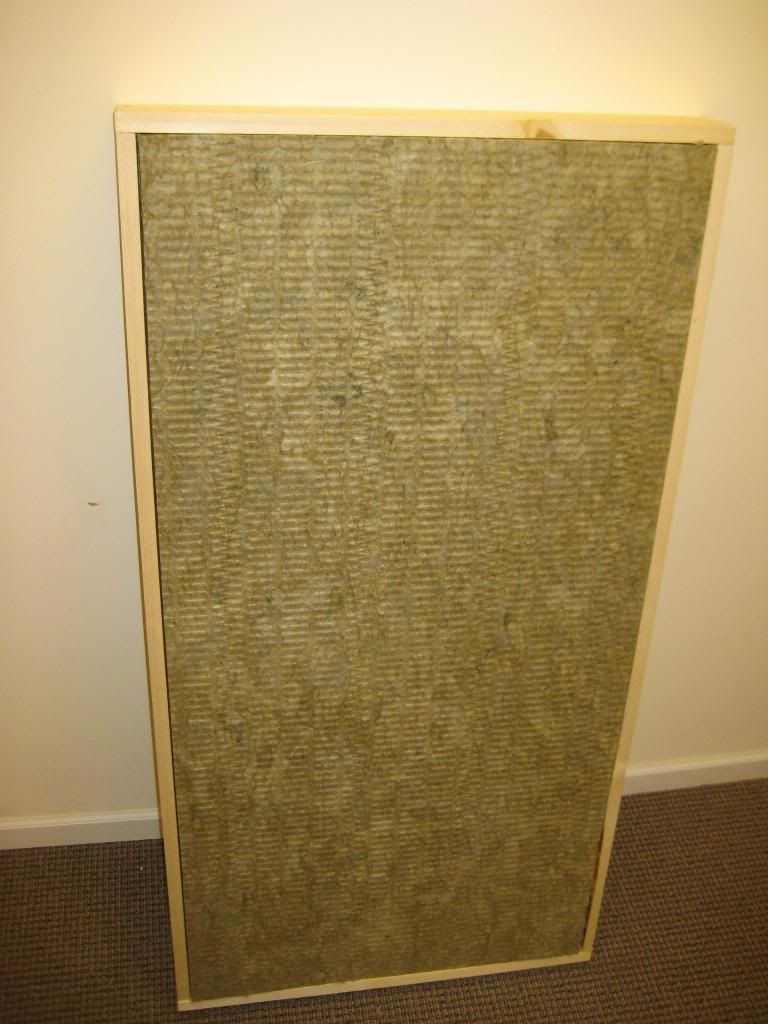
The frame is now finished and ready to install the material. Place it into the front of the frame like this.
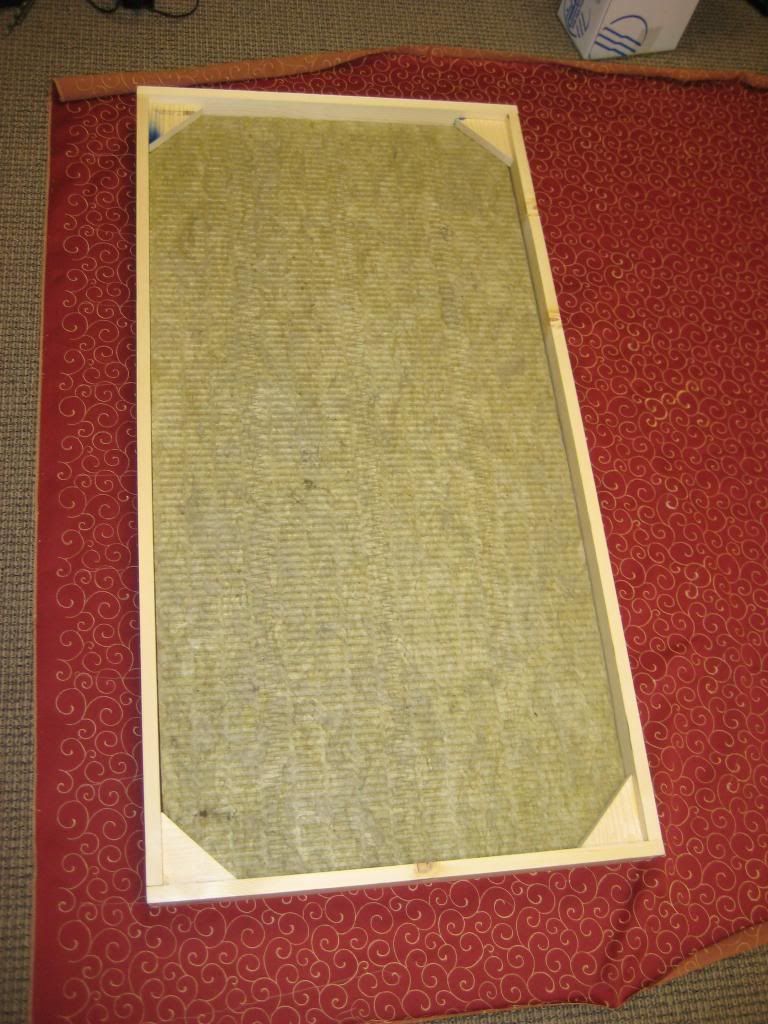
Lay your material of choice down on the floor and place the frame with material face down on top of it. You can also see the back side of the frame with the corner braces and air gap.
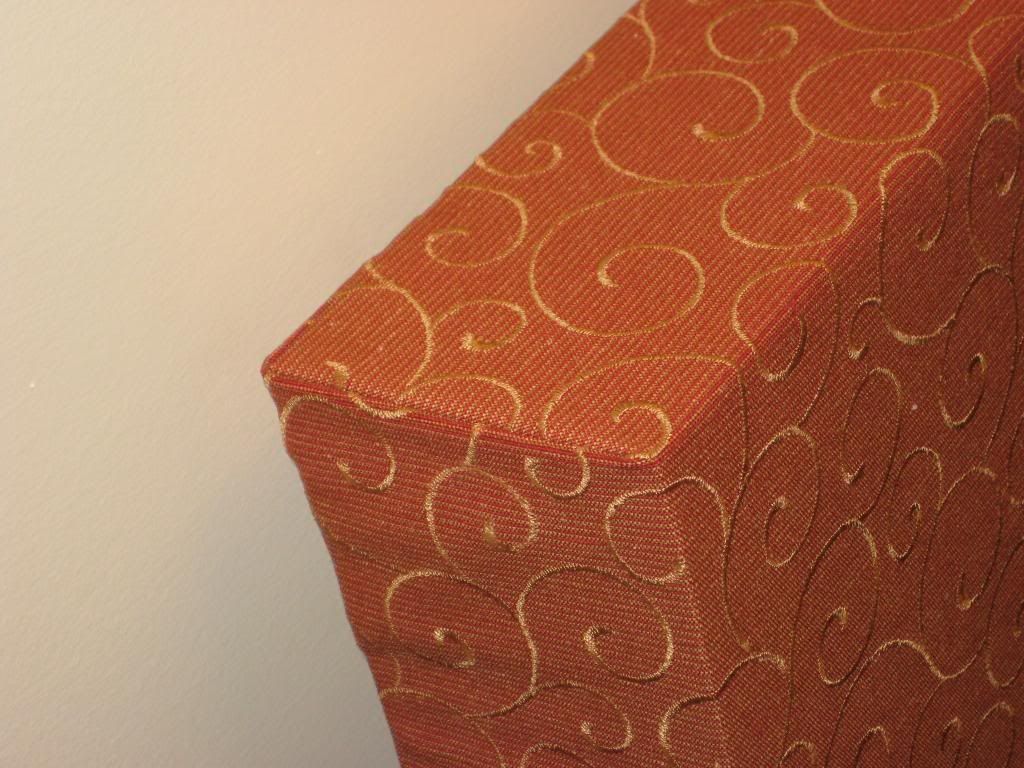
You are ready to start stapling at this point. Start at the top (or bottom) in the center and staple out. Then move to the opposite side. You will want to make sure you are pulling your fabric tight again starting in the center and stapling out. Then move on to your sides following the same process. Don't staple all the way to the ends quite yet though. You will want to leave some slack for the corners. They can be tricky, but the key is to take your time and don't be afraid to try it a couple of time until you get it right. Once you have it where you want it, go ahead and put a staple in the corner. This will hold it so that you can tighten and staple the rest of the corner fabric. When folded this way you should not see the seam from the side when you view it on your wall. Here is a video that shows you how I make my corners. Here is a quick video to show you the process.
It should look like this.
Here is a picture of the back of the panel with the fabric stapled.
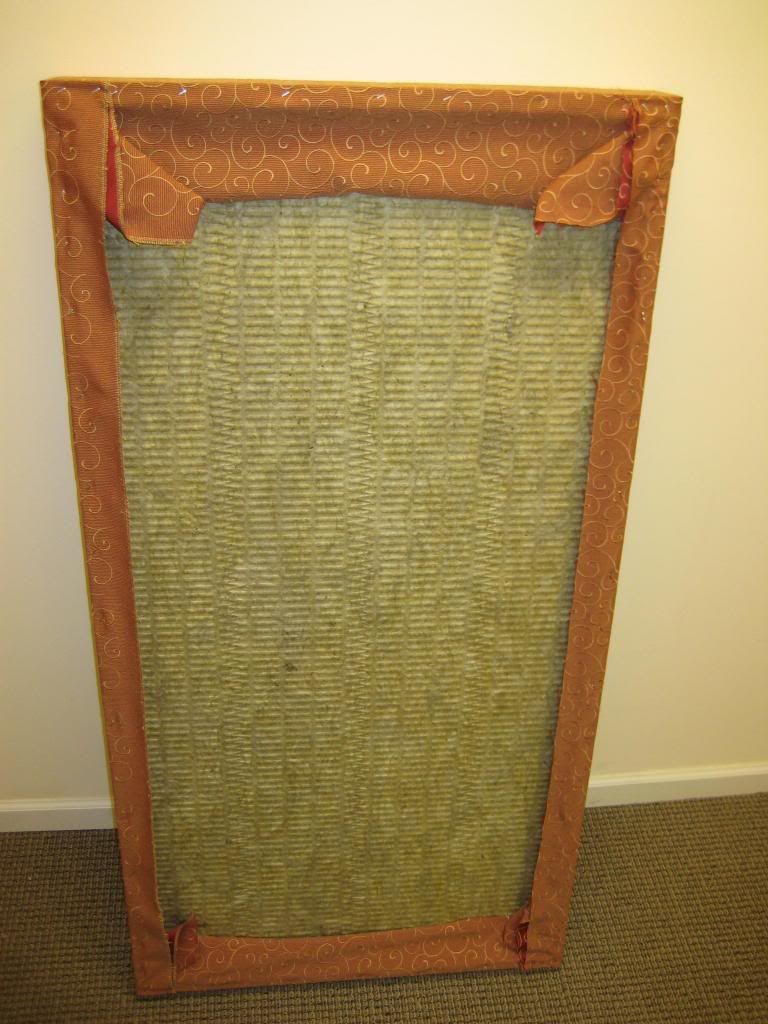
Feel free to trim it up if you like. I don't bother as it will not be seen and gives me a bit of material to work with in the future if I need to make adjustments on the fabric.
Here is your (almost) finished product.
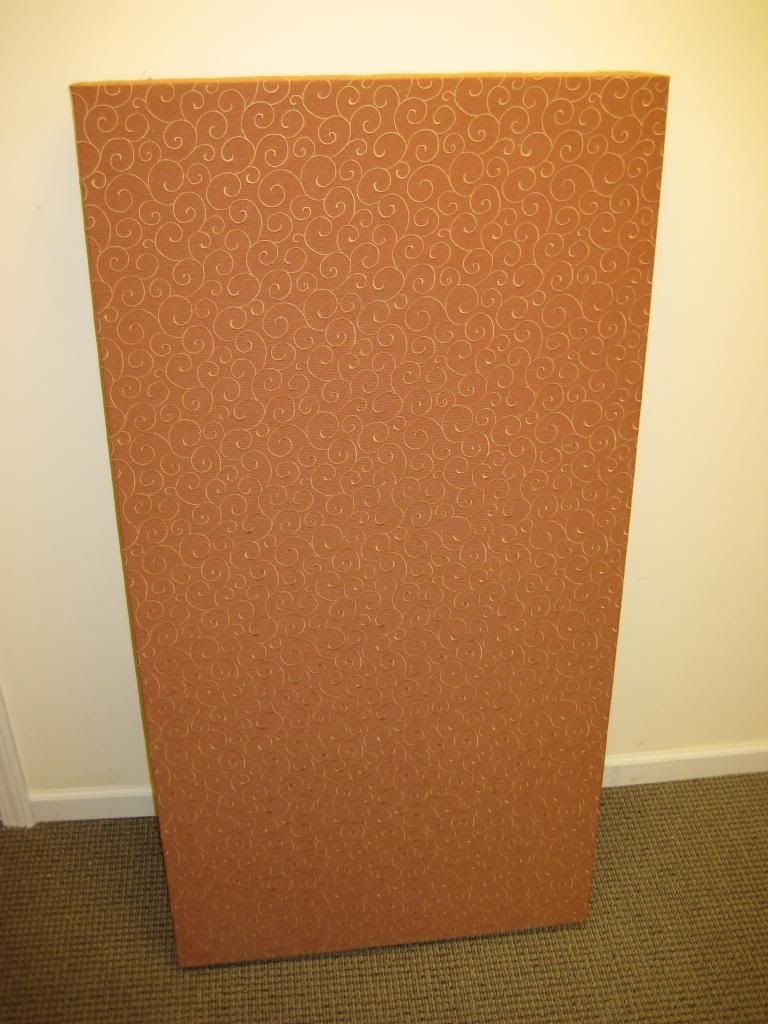
The only thing left to do is mount the panel. There are several ways you can do this. Various products are offered by the sites above that sell the acoustic material. Below are a few other options that I have tried.
For the panels built in this tutorial I will be hanging them with a French cleat. You can make this with the scrap wood you have by simply making a 45 degree angle cut lengthwise on your board. This may be tricky to do and a bit dangerous. French cleats can be found in the picture hanging section of just about any hardware or hobby store and come in various sizes. They are my personal favorite to use as they are very easy to hang on the wall once the bracket is up. Depending on the size you choose, it will also offer you a little side to side adjustment. The downside is they are typically the most expensive option and create the most damage to walls as you will likely need to use a zip it in the dry wall. This is easy to patch though.

The second method is also found in the picture hanging section. It is more common sawtooth style and you might even have some laying in a drawer. Depending on the size you may get a way with using just one if you hit a stud, but I would recommend using two. You may also end up needing to use a zip it with these.

The last way that I have tried is my least favorite. Though it creates the least damage to the wall, it is a real pain in the rear to hang. It is also is very common and might be in a drawer.
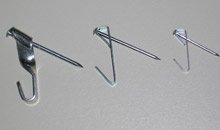
You will also need eye hooks and picture hanging wire. Screw the eye hooks into each side of the frame and then string the picture wire across the back of the panel, through the eye hook and then twist it back on to itself.
There are other ways out there, but I haven't tried all of them. If you have better suggestions please post for everyone's benefit.
Hopefully this tutorial was helpful and aids in transforming your room into a better listening environment. If you have any questions or idea's, don't hesitate to post them.
Tools:
Tape Measure
Saw (chop/miter works best)
Staple Gun
Cordless screwdriver/drill
Countersink bits
Hammer
Pen/pencil
Square
Corner Clamps
Quick Clamp
Hammer
Materials:
1x4 (8ft in length typically) boards
Wood Glue
Screws (I used drywall screws)
Staples
Brad or finish nails
Picture mounting hardware (if hanging, pics below)
Fabric of your choice - I would recommend at least 60" x 36"
Acoustic material - Roxul 60, Owens Corning 703/705, rigid fiber board
You can find acoustic material at local HVAC dealers or on the web at www.atsacoustics.com/cat--Fiberglass-and-Mineral-Wool-Batts-and-Boards--106.html or from GIK Acoustics at www.gikacoustics.com/product-category/building-supplies-diy/
To get started, you will need to cut all your boards to length. Here are your measurements:
48" x 2 boards
25.5" x 2 boards (they are longer for overlap with the 48" boards)
4 Corner pieces (see below)
This is the layout of the boards. The shorter pieces go on the top and bottom of the longer ones.

Corner braces. I just used the saw and made 45 degree angle cuts from the left over section of board. One will go in each corner of the frame. More on this shortly.

After you have all your boards cut, you will want to join the corner together. This is were you will use your corner clamps. They are not required, but help out a lot. Your corner should look like the picture below with the shorter piece on top.

At this point, you are ready to drill your holes. Some of you out there will think about skipping this step. I highly recommend that you don't. Pre-drilling will keep from splitting the wood and you losing your temper. It is best to use a countersink bit so that the screws sit flush or even slightly recessed into the board. If you don't have countersink bits, not big deal. You can drill a pilot hole the correct size for your screw first and then use a larger bit in the same spot barely drilling into the wood to accomplish the same thing.
Once you have your holes drilled, undo only one side of the corner clap. Use wood glue one both pieces of the wood at the corner. Then you will line up your corner again and tighten the clamp. Now you can proceed with screwing the corner together. The screws will hold the corner together so you can take off the corner clamp. If you have more than one, I keep it on until I have screws in both sides.

Now that you have all 4 corners glued and screwed, you are ready to move on to installing the corner braces. These corner braces have 2 important jobs. The first is obviously to brace the corner. The second is to keep the acoustic material at the front of the frame and provide the proper air space behind the panel. To place these properly, simply use a scrap piece of your 1x4 and place the corner and then place a corner brace on top of it. Since a 1x4 actually only measures .75", doubling them up will give you 1.5" of air space and leave 2" for the material. You will only attach the corner brace, not the board underneath you are using as a spacer. It should look like this.

Now you will apply glue to each side of the corner brace and frame. At this step I opted to use a clam to secure the corner while I put a finish nail in from the outside. I did this because the screw is a bit too larger for the amount of material in the corner. Moving it in where there is more wood runs the risk of the screws hitting each other. In the picture below you can see how I clamped the corner and the nail in the outside. Do this on both sides. The trick is measuring up .75" to 1.5" so you have a guide as to where your corner brace is actually sitting in the frame.

Repeat this process for the remaining 3 corners. Here are a couple pic of the corner braces in place.


The frame is now finished and ready to install the material. Place it into the front of the frame like this.

Lay your material of choice down on the floor and place the frame with material face down on top of it. You can also see the back side of the frame with the corner braces and air gap.

You are ready to start stapling at this point. Start at the top (or bottom) in the center and staple out. Then move to the opposite side. You will want to make sure you are pulling your fabric tight again starting in the center and stapling out. Then move on to your sides following the same process. Don't staple all the way to the ends quite yet though. You will want to leave some slack for the corners. They can be tricky, but the key is to take your time and don't be afraid to try it a couple of time until you get it right. Once you have it where you want it, go ahead and put a staple in the corner. This will hold it so that you can tighten and staple the rest of the corner fabric. When folded this way you should not see the seam from the side when you view it on your wall. Here is a video that shows you how I make my corners. Here is a quick video to show you the process.
It should look like this.

Here is a picture of the back of the panel with the fabric stapled.

Feel free to trim it up if you like. I don't bother as it will not be seen and gives me a bit of material to work with in the future if I need to make adjustments on the fabric.
Here is your (almost) finished product.

The only thing left to do is mount the panel. There are several ways you can do this. Various products are offered by the sites above that sell the acoustic material. Below are a few other options that I have tried.
For the panels built in this tutorial I will be hanging them with a French cleat. You can make this with the scrap wood you have by simply making a 45 degree angle cut lengthwise on your board. This may be tricky to do and a bit dangerous. French cleats can be found in the picture hanging section of just about any hardware or hobby store and come in various sizes. They are my personal favorite to use as they are very easy to hang on the wall once the bracket is up. Depending on the size you choose, it will also offer you a little side to side adjustment. The downside is they are typically the most expensive option and create the most damage to walls as you will likely need to use a zip it in the dry wall. This is easy to patch though.

The second method is also found in the picture hanging section. It is more common sawtooth style and you might even have some laying in a drawer. Depending on the size you may get a way with using just one if you hit a stud, but I would recommend using two. You may also end up needing to use a zip it with these.

The last way that I have tried is my least favorite. Though it creates the least damage to the wall, it is a real pain in the rear to hang. It is also is very common and might be in a drawer.

You will also need eye hooks and picture hanging wire. Screw the eye hooks into each side of the frame and then string the picture wire across the back of the panel, through the eye hook and then twist it back on to itself.
There are other ways out there, but I haven't tried all of them. If you have better suggestions please post for everyone's benefit.
Hopefully this tutorial was helpful and aids in transforming your room into a better listening environment. If you have any questions or idea's, don't hesitate to post them.


