
A few notes from my HDMI v3 board self-install
Aug 5, 2018 12:33:28 GMT -5
bootman, ÈlTwo, and 5 more like this
Post by tesla on Aug 5, 2018 12:33:28 GMT -5
My v3 HDMI board online order somehow got logged as a "factory install," but after I called the nice folks back in Franklin and changed the order to a self-install, I had my upgrade kit within a few days. For those unsure about whether to opt for a factory- vs. self-install for this upgrade, don't fear tackling this yourself. If you can read and turn a screwdriver, you can easily perform the upgrade.
Like all Emo documentation, the instructions that come with the v3 video board kit are first rate and very detailed, despite this upgrade being about as easy as it could possibly be. Basically, you just update the firmware using the supplied thumb drive and unplug the unit, pop the cover, unplug four cables from the old video board and remove it, swap in the new board, reconnect the cables, and button the thing back up. Done.
Regarding the firmware upgrade, if you forget - despite being instructed to do so at the very beginning of the printed instructions - to first change your unit’s standby setting to “Lowest Power,” don’t panic! Your unit will display an error message that says “err: init HDSB82” as it attempts to reboot after the firmware update. This is because it’s puking on the original video board. After you’ve installed the new board, all will be well on the next reboot. Ask me how I know.

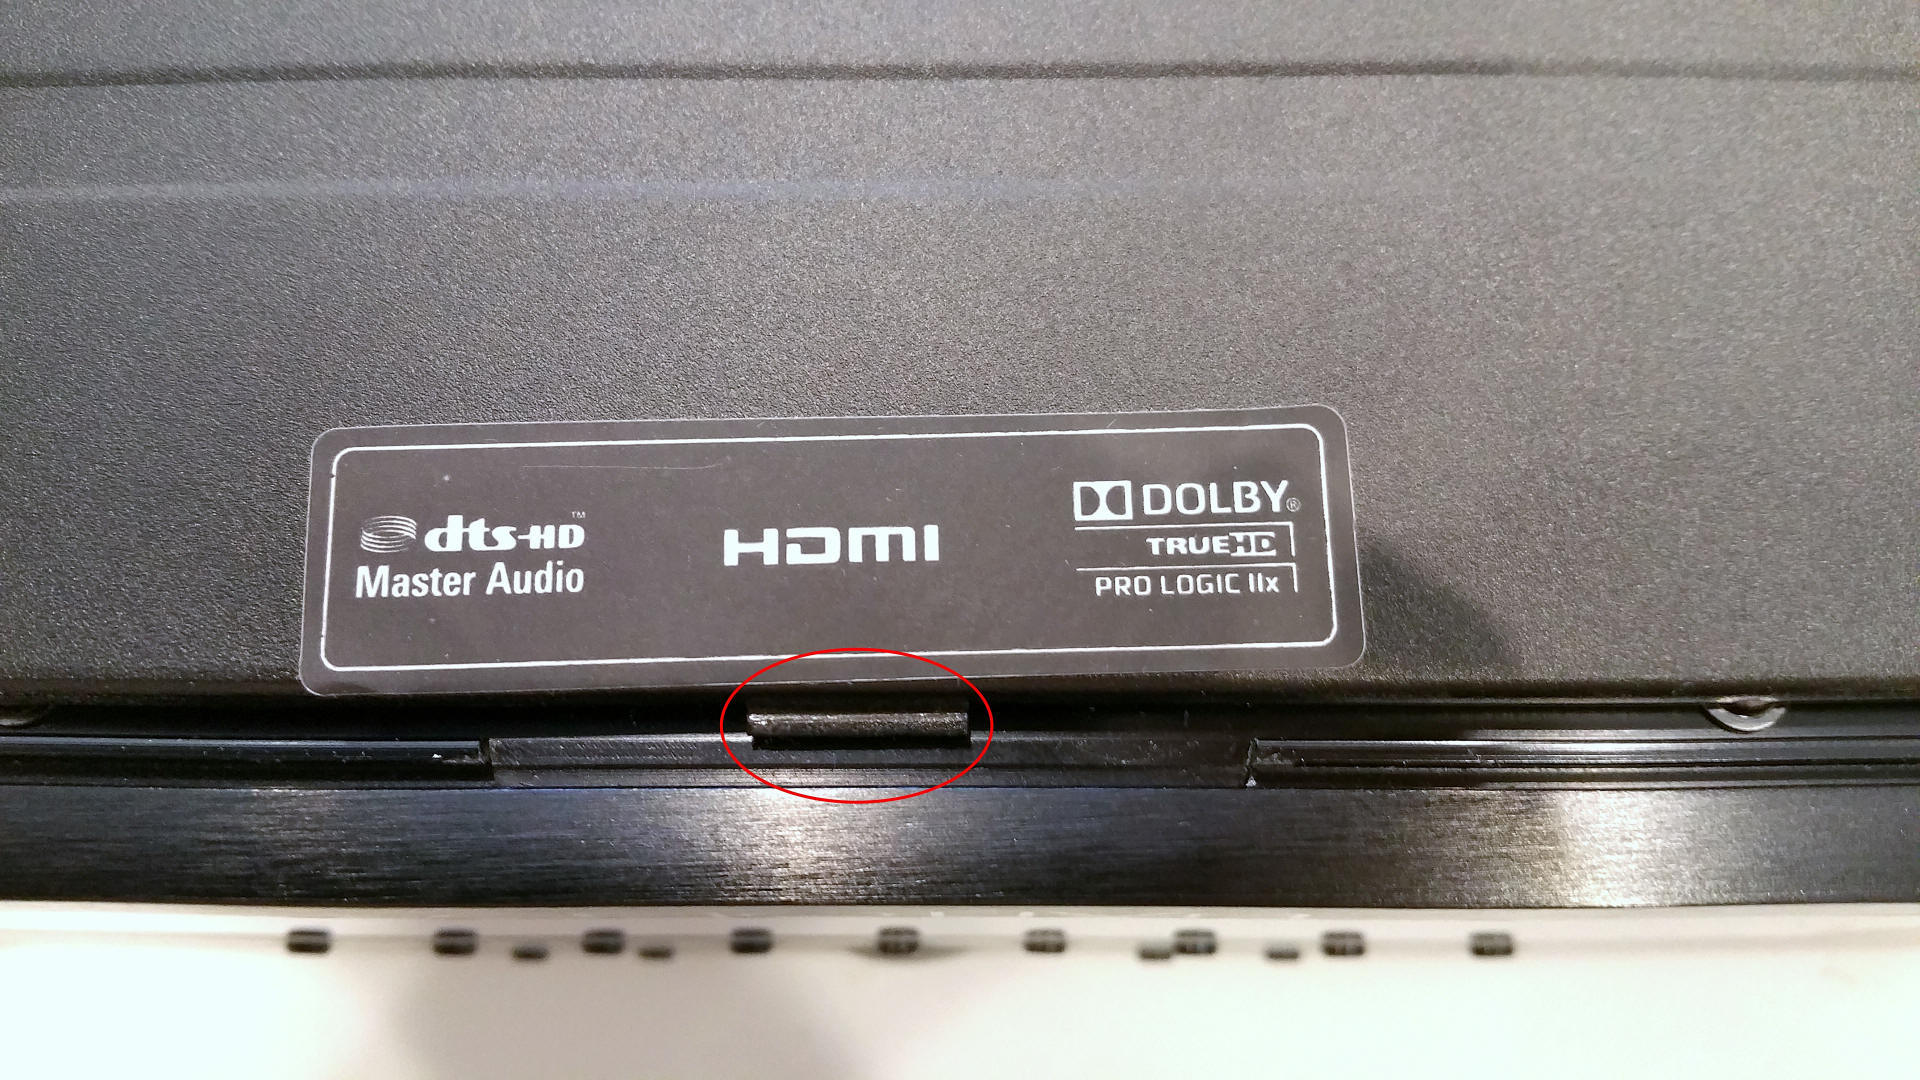
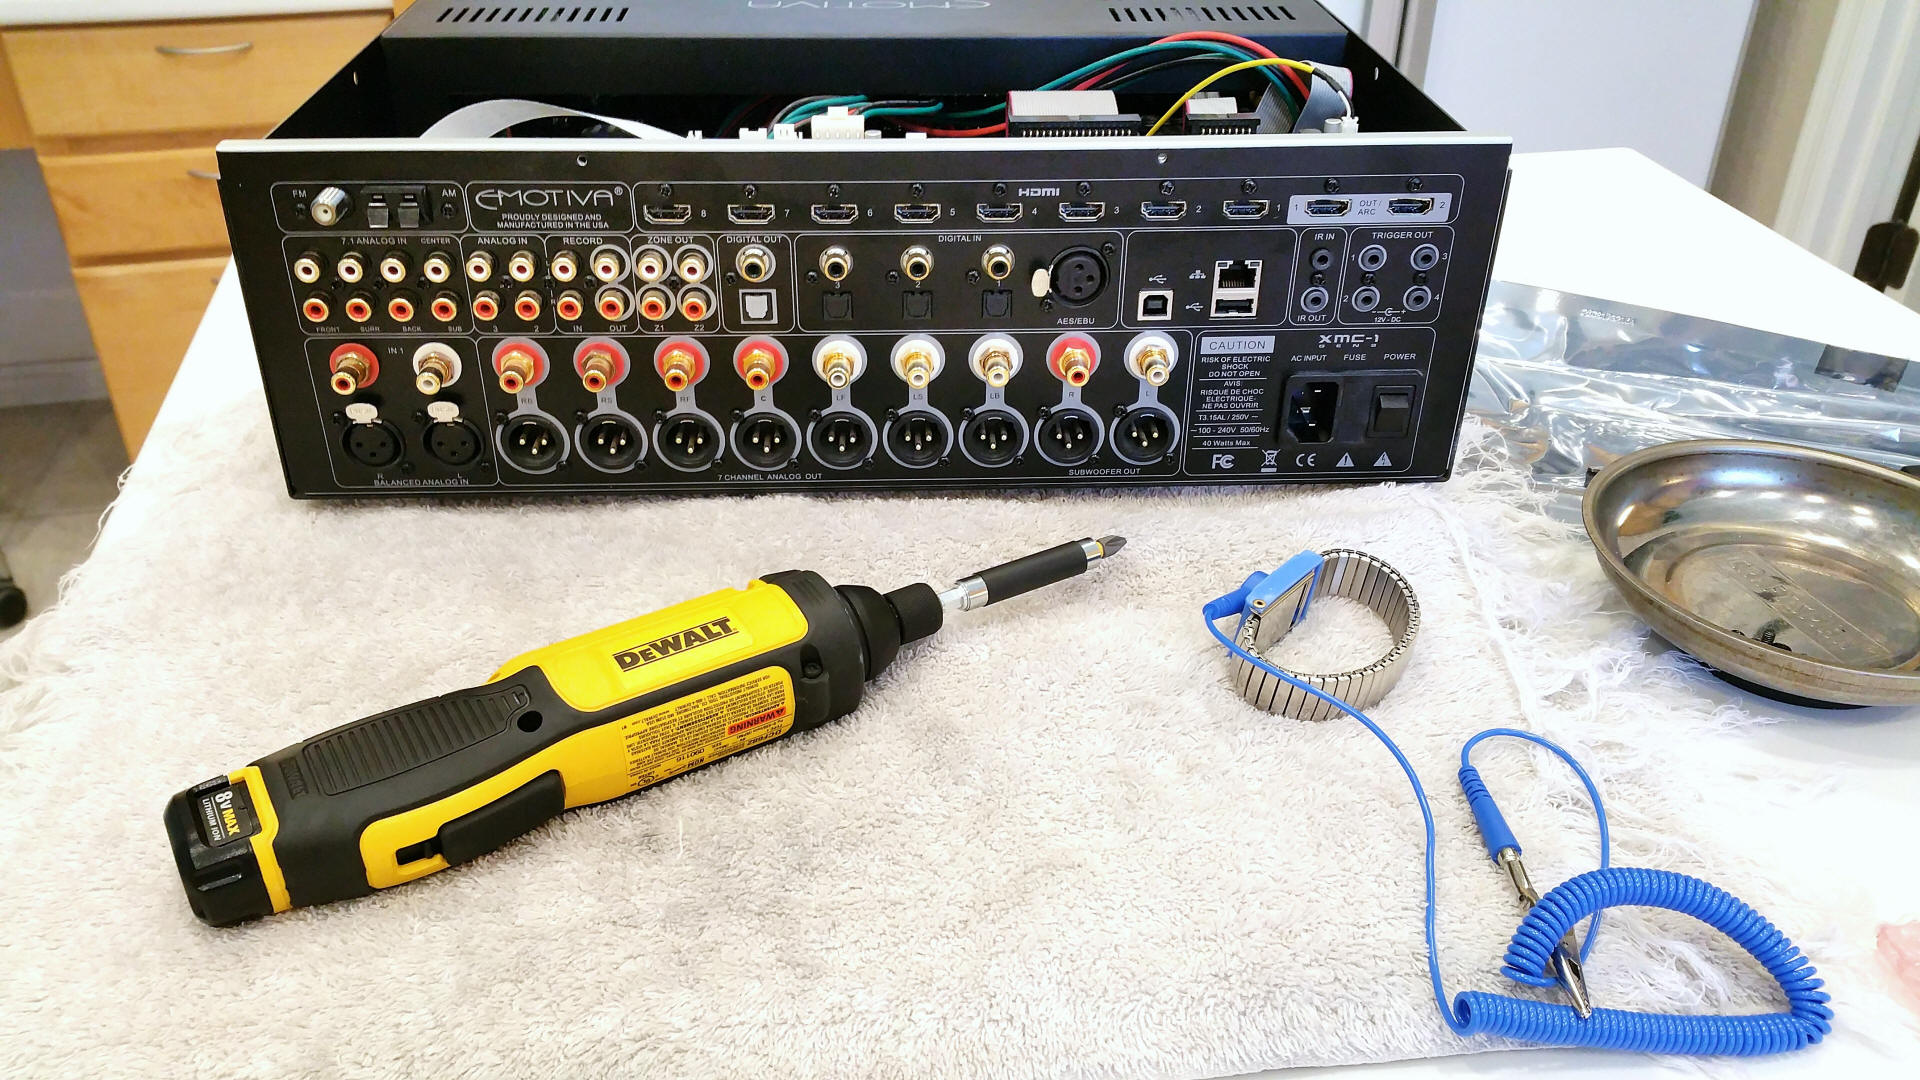
After you remove all 8 screws securing the unit’s top cover, Step 4 of the instructions advises you to “Remove the top cover by lifting up from the rear edge.” This had me stumped for a few minutes, because my cover wouldn’t release. The rear of the cover would lift, but there was something at the center of its front edge, below the faceplate that was preventing me from lifting the cover away. After trying several different less aggressive methods of getting the cover loose, I gave it a quick smack with the heel of my palm, and the front locking tab finally let go of the front panel’s underside.
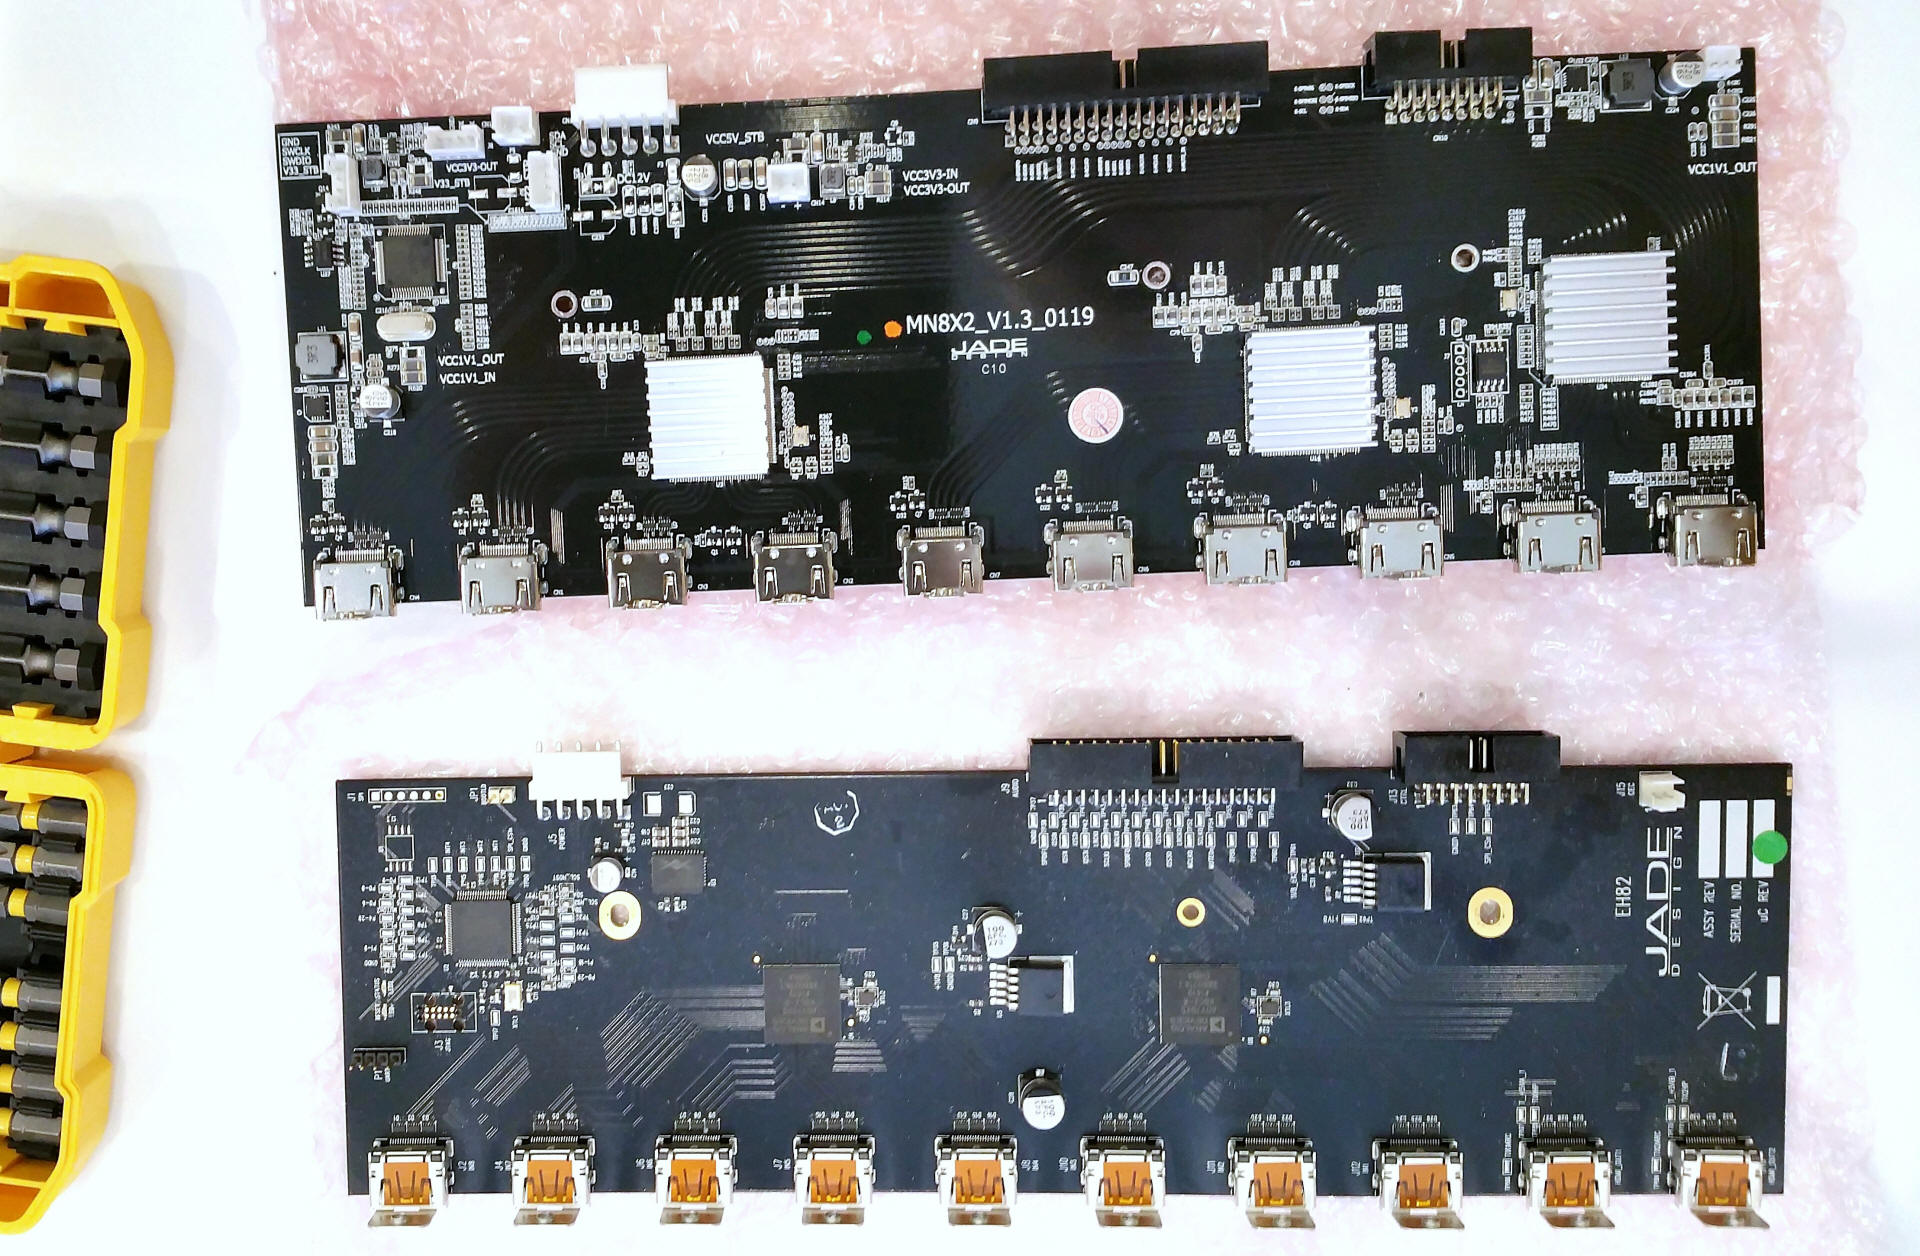
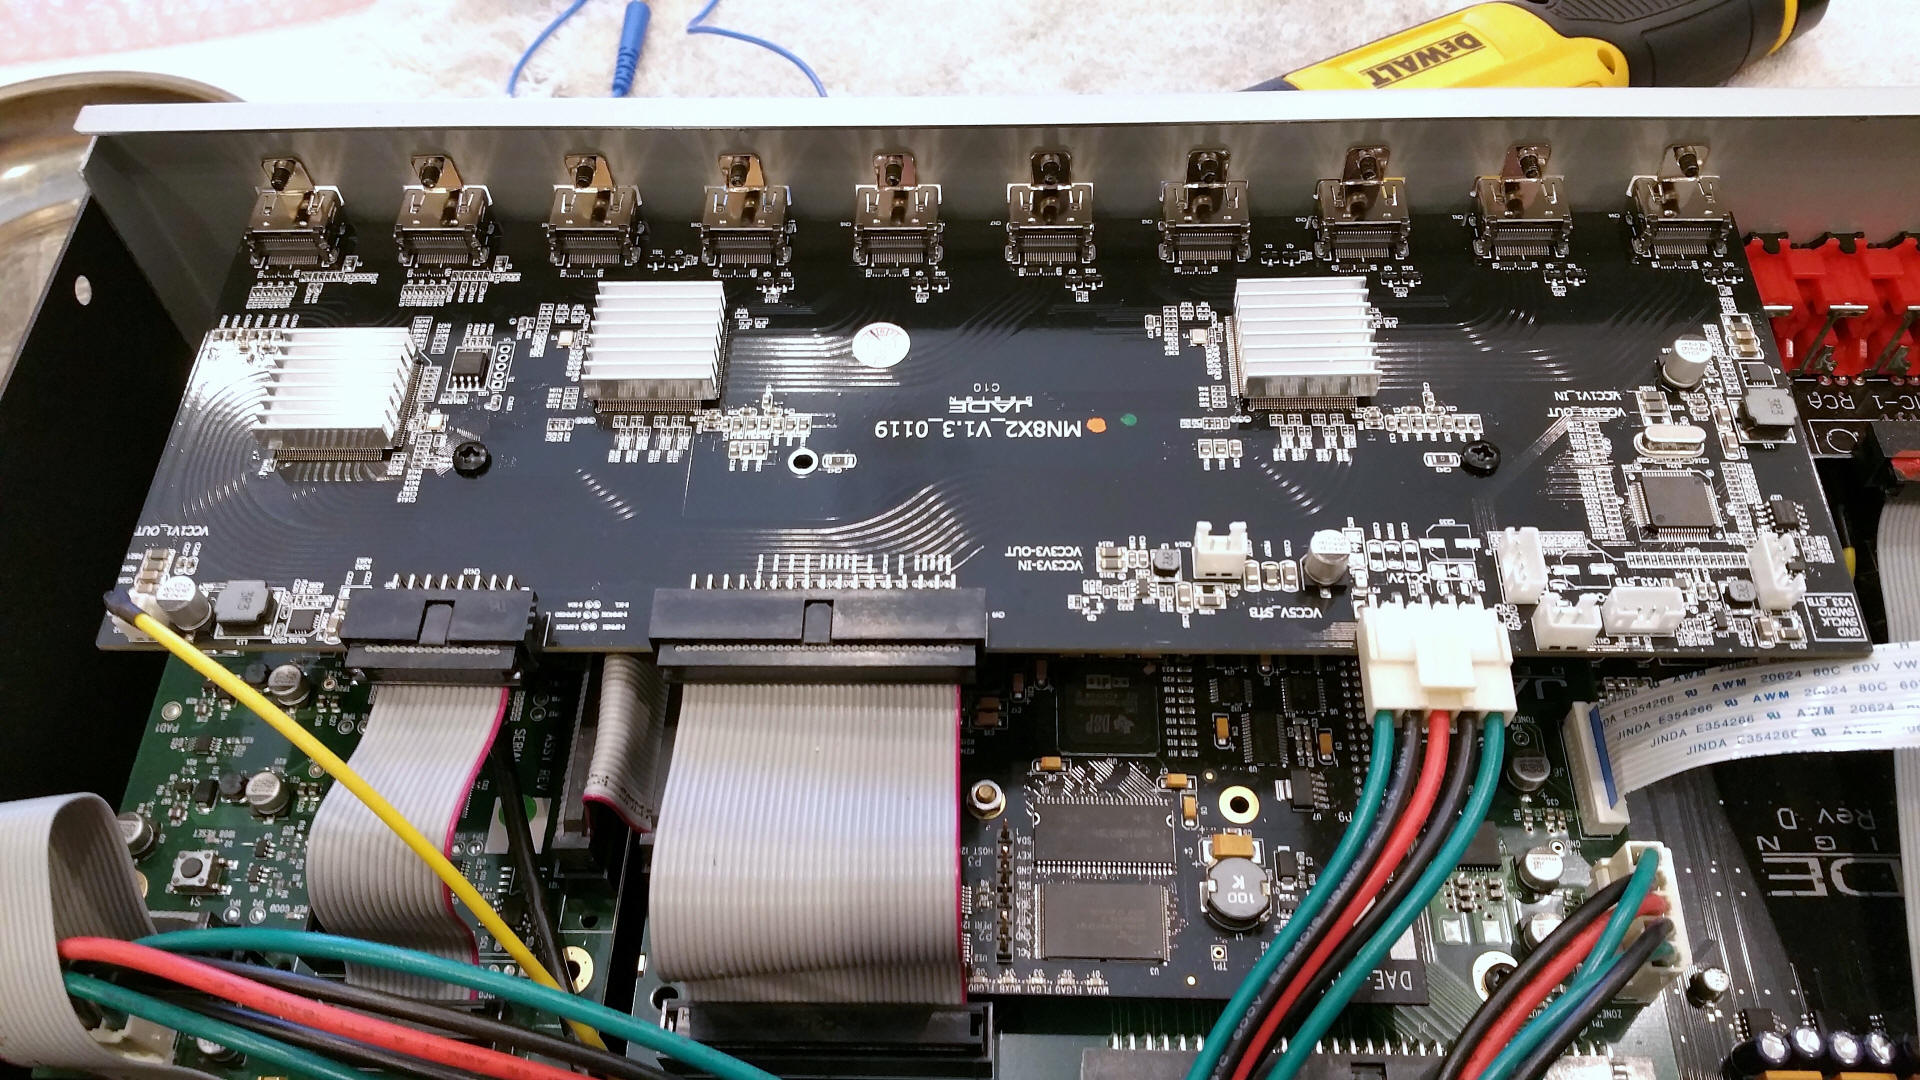
After unplugging the 4 cables connected to the board, I removed the screws securing it to the unit, and the board lifted right out. There are a total of 12 retention screws, 10 along the back panel, plus 2 on the top of the board securing it to a pair of metal standoffs beneath. As you can see in the photo below, the new video board (top of photo) is quite a bit more complex than the original. The new board is also equipped with more cable receptacles, which are presumably there for use with the ATMOS / DTS-X upgrade.
After I removed the original video board, Step 11 of the instructions advised me to loosen up the 2 standoffs prior to installing the new board and loosely attaching it with the 10 rear panel retention screws, followed by the two on the top of the board. I had no difficulty loosening one of the standoffs. However, the other – the one on the left in the photo below – would turn, but continued to remain tight. To work around this issue, I modified the order of screw installation to first loosely attach the board with the two screws going into the standoffs.
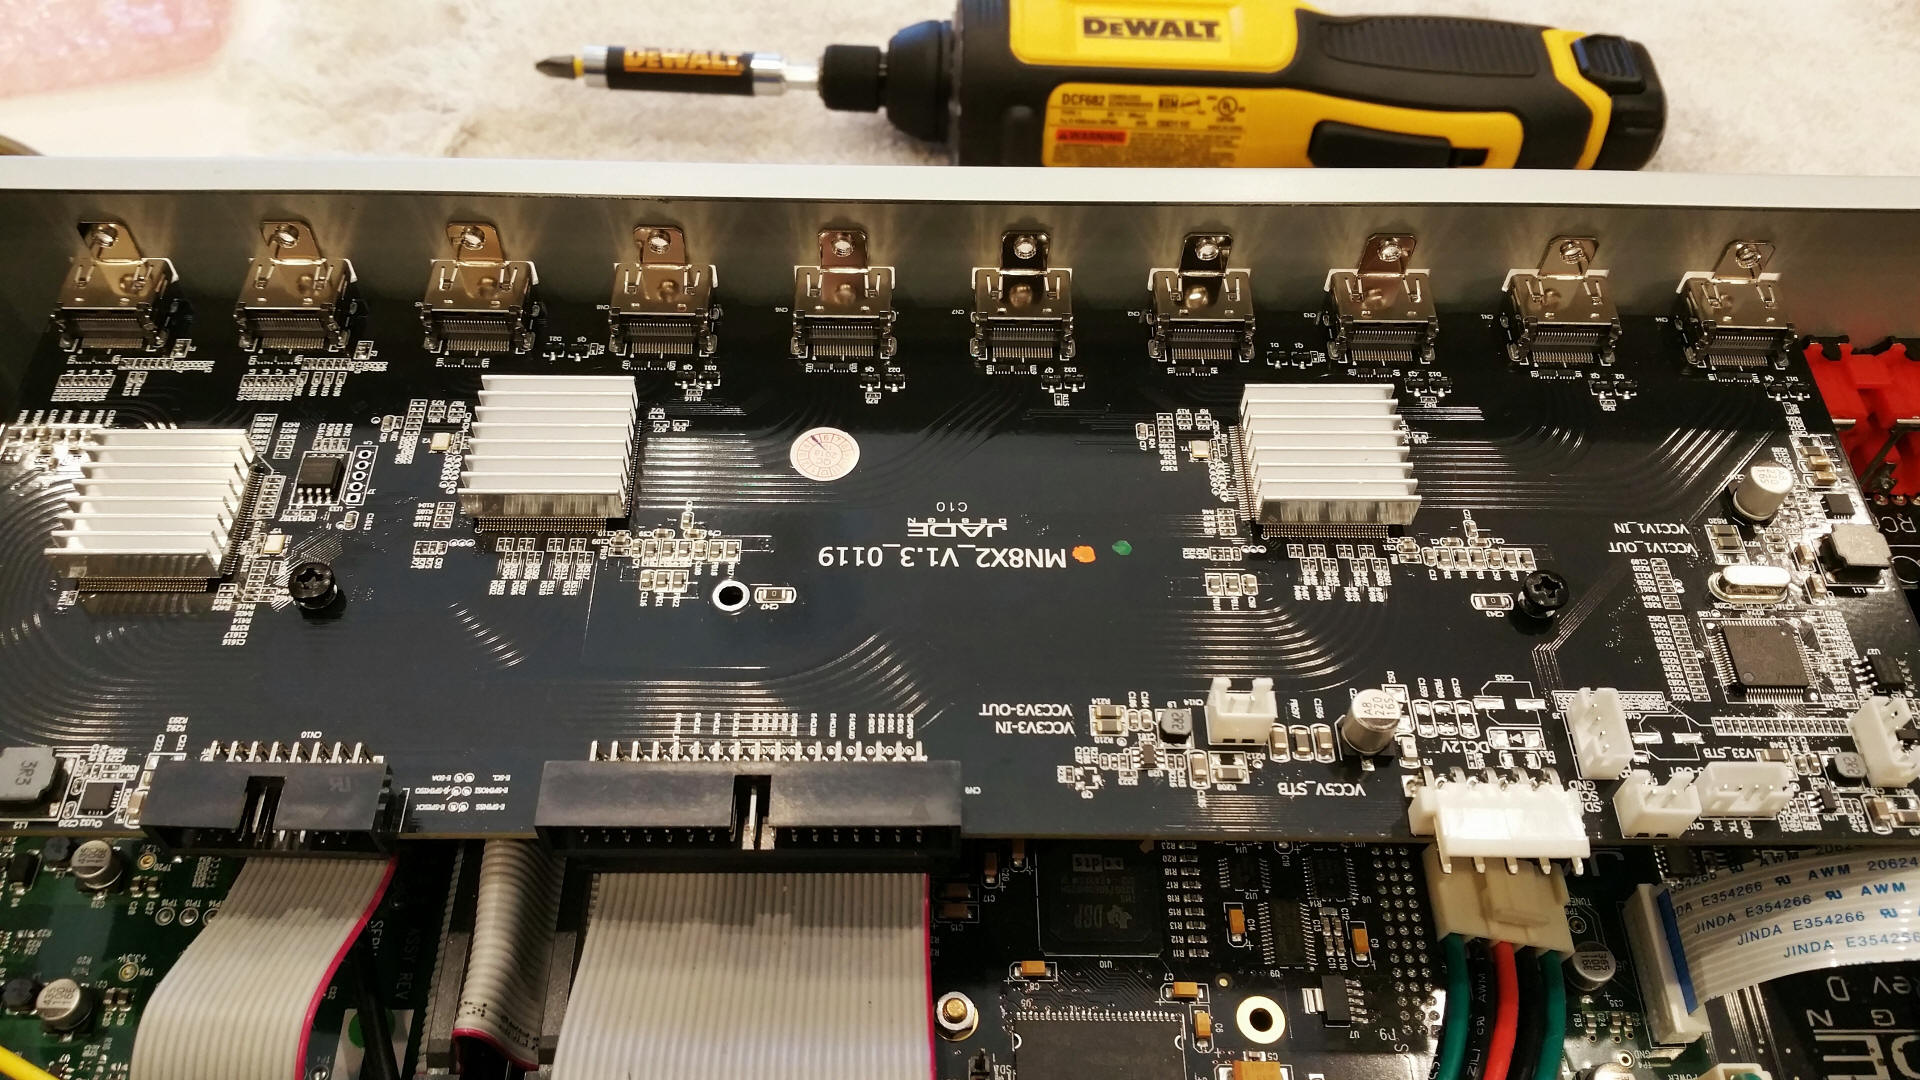
I then installed the 10 screws on the rear panel, tightened down all 12, and all was well. A few additional items shown in the photo below are worth mentioning. You’re going to have 20 loose screws rolling around at the midpoint of this procedure. Have some sort of tray handy to collect them in (metal tray center right). Also, it’s a good idea to use an electric screwdriver with the appropriate Phillips tip to remove and reinstall all these screws, unless you’re fond of carpel tunnel. Finally, the anti-static wrist strap supplied with the kit (bottom right) is a real keeper. Very nice indeed.
After securing the new board, I connected the 4 cables.
Then, I reinstalled the top cover, fired up the unit, and confirmed the firmware update.
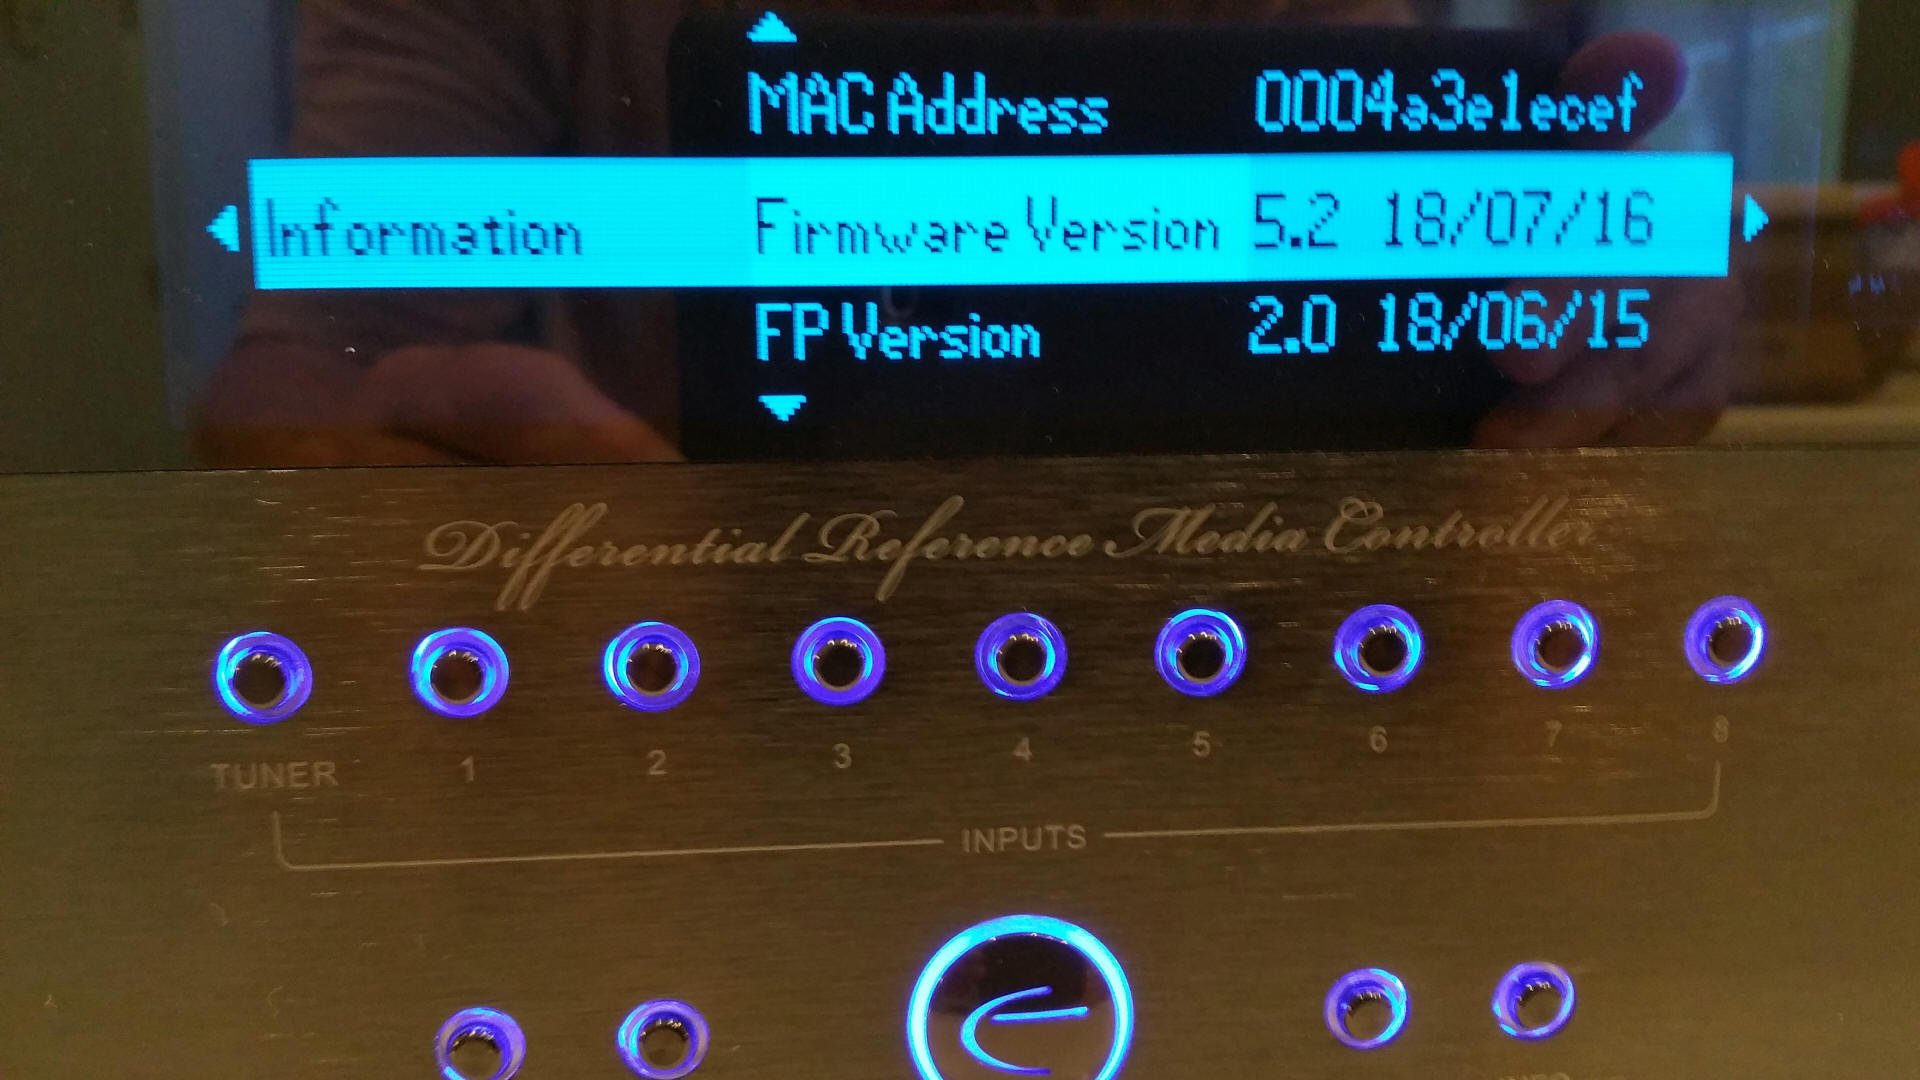
So far, the new board has been working flawlessly. It looks like Emo changed the menu font with the new firmware. It certainly is much easier for me to read than before.
Also, even though my old HD plasma TV is still providing the images for my system, I swear there’s less banding, better color saturation, and sharper detail. Maybe, this is just expectation bias, but I’m happy with the results regardless. Now, it’s time to start looking in earnest for that OLED tele I've been considering.


